So, you bought your first wood pellet grill and can’t wait to enjoy some delicious smoky treats! You go to fire it up and realize you don’t know the first step to cooking on a pellet grill and are wondering where to start. Our pellet grills are meant to make smoking easy with pre-sets and simple controller navigation. But that doesn’t mean that there aren’t essential techniques to ensure you get consistent results. Take a look at some of the steps we’ve laid out to start your pellet smoker journey.
Select the right fuel
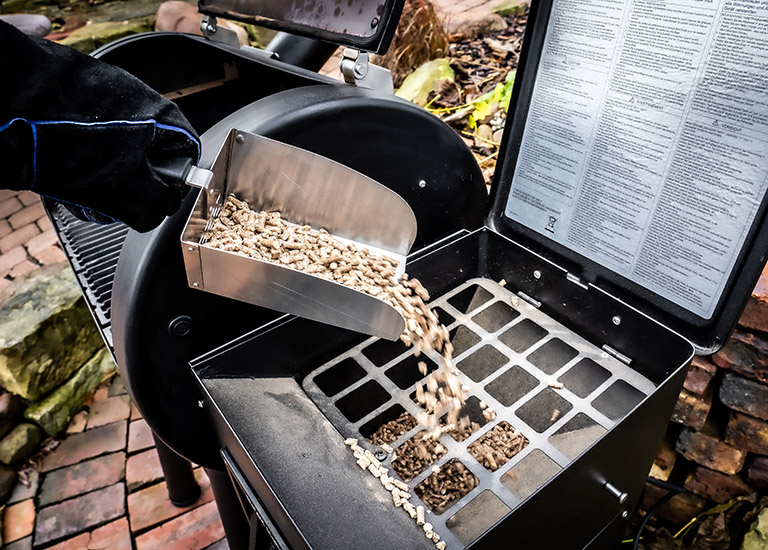
One of the first steps to ensuring a successful cook happens before you even turn your grill on. Using a high-quality pellet that’s free from additives and sized appropriately for your Broil King grill is imperative. You also have flavour options which will impact the intensity of the smoky profile.
Our line of Broil King Pellets is made from 100% natural wood and guaranteed to work with your Crown or Regal Pellet to avoid auger jams. They also burn slower for better fuel efficiency and less ash. They come in five varieties: hickory, mesquite, applewood, smoke masters blend, and grill masters blend. Mesquite and hickory are the most intense and better for shorter cooks, such as steaks or burgers. The blends and applewood pellets are milder and well-suited for low and slow cooking, so the smoke doesn’t overpower your food’s natural flavours and seasoning.
While you can find other sources of pellet fuel that will work in a Broil King grill, it is vital to compare the diameter of different brands. If the pellets are larger than 6mm, they could jam and burn out your motor.
Make sure the burn pot and grease tray are clear before each cook
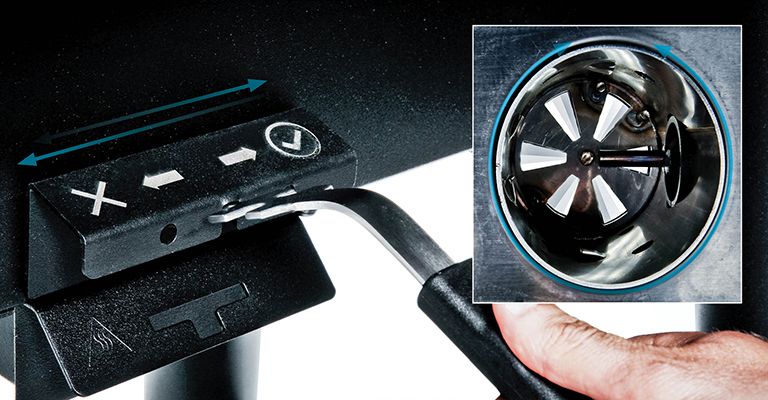
If this is your first time firing up the grill, this won’t be a consideration. But if you already have a few cooks under your belt, you need to clear the burn pot and grease tray before you start the grill. If the burn pot is full of ash, it may prevent the new pellets from lighting or smother the embers, which means the grill’s temperature won’t climb, and it will automatically shut down after 20 minutes.
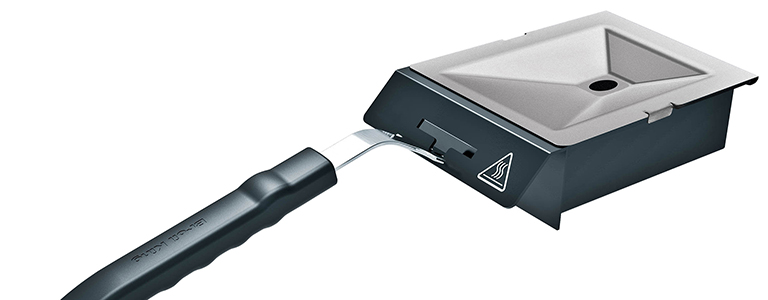
Clearing the burn pot is exceptionally easy with the built-in agitator. You can use a Grid Lifter or your hands to shift the agitator from side to side. Once you believe the ash has been cleared, ensure you have returned the agitator to the closed position (indicated by the check mark).
The grease tray is removed from the bottom left of the grill and should be scraped out and or washed regularly. To simplify the job, you can use the Drip Pan Liners, which can be lifted out and discarded with the grease inside.
Give the grill time to settle
Arguably the most crucial thing to remember when grilling with a pellet grill is to have patience; give the grill time to reach the desired temperature and settle. A slight fluctuation of + or – a few degrees is normal. The time it takes to settle can vary widely depending on the conditions and the desired temperature. A general rule of thumb is to budget roughly 45 minutes for your grill to even out. Let the flame build, let the smoke build, and you’ll have better flavour
One of the common misconceptions about pellet grills is that they will heat up as quickly as your gas grill. They are just as easy to fire up (they start with the press of a button), but they are more similar to a charcoal grill in the time it takes to reach the desired temperature. The ambient temperature outside, whether the grill is in full sun or the shade, and pellet type can all impact the start-up time and performance. Your grill may even overshoot your desired temperature in the warm-up phase. Give it time to level out, and you’ll have a more stable cook, particularly for low and slow smoking.
Keep the lid open at the start
This step is listed in your owner’s manual but is often overlooked. It is important to help the grill regulate its temperature and to ensure that you burn off all that heavy, white smoke that is emitted at the start. That thick smoke will give anything on the grill a bitter taste rather than that subtle woodsy aroma you desire. You’ll know it’s time to close the lid when the smoke becomes light, wispy, and almost transparent. Once you’ve got a clean smoke and a warmed-up grill, you can add your food.
Keep lid lifts to a minimum once cooking
Once you’ve added your food, you want to limit the number of times you open the grill. You not only lose heat but that delicious smoke too. That’s where a temperature probe becomes quite useful. You can use the included probes with your Regal pellet with pork butts and beef briskets or opt for separate wireless probes. Whatever you choose, they will allow you to monitor your cook without having to lift the lid and temp your meat. That way, you keep all that smoky goodness inside the grill, where it can make contact with your food.
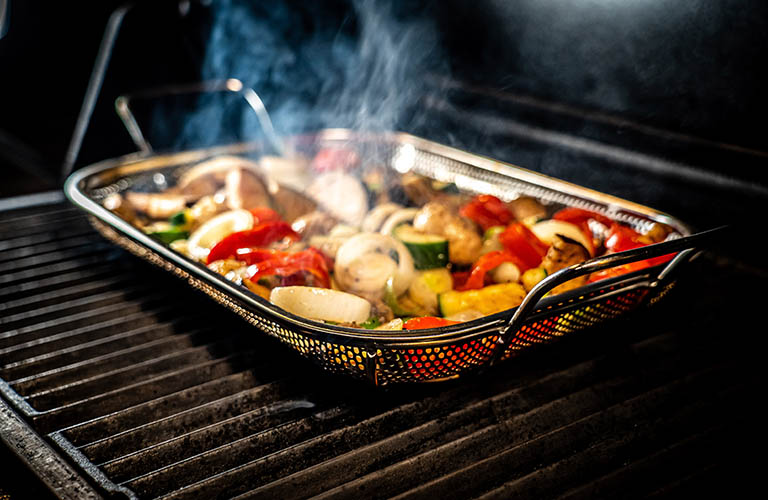
Use cooking vessels with perforations
Another tip when cooking items like chopped veggies is to pick a pan or dish with perforations to allow smoke to reach your food from all sides. The Broil King Roaster Basket or Deep Dish Wok are go-to’s since they have small openings for smoke to creep in and infuse with your food. If you’re cooking with liquids, this won’t apply. Instead, try to use a Roasting Pan or leave the lid off of your pot so that smoke can still creep in. You will likely have to stir your food more often so that smoke can permeate all your food and not just what’s sitting at the top.
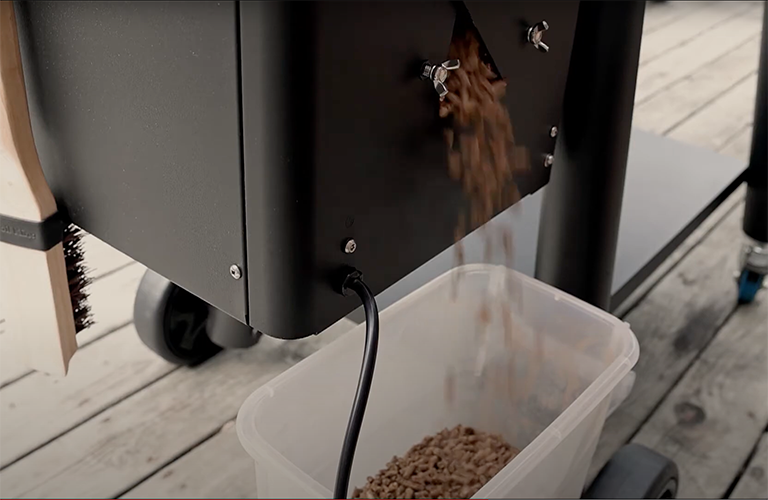
If you’re storing the grill – empty the hopper
One final note that isn’t so much a technique but rather a caution; if you plan to put your pellet grill away for an extended period, you must empty your hopper. Wood pellets are like sponges; they will soak up moisture in the air and expand. Once they do, they become like cement in your auger and lock up the motor. When this occurs, you have to pull out your auger and brush it out to get it moving again. Emptying the hopper ahead of time helps prevent massive blockages from forming so that your grill can fire up when you bring it back into use.